Wednesday, February 19, 2014

DIY & Crafts: Valentine Lightbulb

Every year for Valentine's day, I try to make something instead or in addition to the usual gifts.  For this year, I've had my mind set on doing this diy lightbulb project ever since I saw it on Pinterest over a year ago. I remember thinking back then that it seemed a bit complicated and dangerous, but it looked so darn cute that I just had to try it this time.  After completing it, I have to say that it wasn't as hard as I initially feared.  Yes, you do have to be careful since there's lots of little sharp glass bits to work with, but with proper safety goggles and gloves on, removing the filament of the bulb (hardest part of the project) went without a hitch.  I used this tutorial from Design Sponge, which also gives you a link to TeamDroid for a separate tutorial on how to clean out the lightbulb. Here are some of the pictures to show the steps. I didn't bother including any of how I cleaned out the bulb since the above tutorial shows it in great detail--just follow their instructions, go slow and don't forget the safety precautions.

to add the wire sculpture, I drilled a tiny hole in the cube and secured it with a little silicone adhesive. I got both the wooden cube and the wire from Michaels. 
I printed out a few with different fonts.
I used brads for a decorative touch. Add the brads to the paper strip first then glue the whole thing to the cube.
use strong clear adhesive to affix the lightbulb to the cube and wait for it to fully cure before handling it.
After 48 hours for the glue to set and it's ready!
incandescent lighbulbs are almost vintage nowadays, aren't they? 

It's a neat little project and definitely makes a very unique gift! I've always liked the shape of a lightbulb and wished I could somehow reuse an old bulb whenever I had to throw one out, and now I'm wondering what else I could turn it into to--maybe a planetarium or a snow globe?


Tuesday, February 18, 2014

Happy 10! Project: Be My Valentine

January was very long and stagnant...physically, we were immobilized by all the crazy weather, and emotionally, I had to deal with the 2 year anniversary of my mom's passing.  It was a really hard month and I guess every January will always be difficult...well, I'm glad it's now February and hopefully I can get going with the rest of the year!

For this photoshoot, it was all about love and happiness!  I had the idea of doing a kissing booth theme for a while now and thought what better time than valentine's day!  I will put together a separate post soon with all the behind the scene prep work that went into it, but it was pretty easy and I think totally worth a little extra effort.  Unfortunately, one of my babies just didn't feel up to sitting behind this "suspicious looking wooden box" for the pictures, so with him I had to improvise and do a session that was more in his comfort zone.

My favorite photo of the session however, came at the end of the shoot when I least expected it--I was lying on the ground taking a rest when both dogs decided to come and join me and they were in a perfect side by side position and ended up falling asleep that way--it was beyond cute and sweet and I'm glad my camera was within my reach to have captured it without ruining the moment!  Just goes to show those natural shots are always the best!

"open for business!"

you'll always have my heart!

together forever!

Well, I hope everyone had a wonderful weekend sharing love with those special people (and animals) in your life!  Valentine's day shouldn't be about extravagent gifts and dining out at fancy restaurants, but rather about appreciating the special gift of love that we were given.  Okay, that's enough sappy talk for one day...I leave you with my favorite picture:

happy valentine's day!


Friday, January 3, 2014

Happy 10! Project: Happy 2014!

Happy New Year!

Can't believe 2014 has begun...I don't feel I'm mentally ready for this new year to start just yet, but I hope to get up to speed soon.  We spent the New Year's day having our traditional brunch and then taking what has now become a 4-year running "New Year Mugshot" of the dogs.  Of course, as part of the Happy 10! Project, I took some additional photos with the same "Happy 2014" theme.

Earlier last week, I took a trip to the store and got some cheap paper party hats in preparation for the photoshoot, and then at the last minute decided that it just didn't seem enough to create that festive mood. So, I ran to the fabric store on the new year's eve in search of something colorful and was lucky enough to spot a metallic blue fabric on the clearance table.  Score!  I grabbed 2 yards and came home happy and proud to be a frugal shopper.  However, while setting up for the session, I quickly realized my mistake and cursed myself for not having bought extra yards of the fabric.  Here's the big lesson and my advice--if you want to create that glamorous, glittery effect with metallic photo backdrop, go with pleats (which requires more fabric).  Stretching it straight to create a seamless background in this case just makes it look homemade-ish and rather boring in my opinion, and you can clearly see the difference in the following photos.  Two yards of the fabric folded into pleats was enough coverage for one dog, but bit of a stretch for two.  Well, overall I'm quite happy with how the photos turned out--here are the ones that made the cut:

our annual "mugshot"--stretched fabric background is a bit boring.
pleated background created instant glam!
she looks so happy~
"I can still see you!"
here's to a great 2014!

Thursday, December 26, 2013

Happy 10! Project: Plaid Christmas

Every year we send out holiday photo cards just like everyone else.  I have mixed feelings about this trend which has now become the norm.  I do love receiving photo cards and prefer them over the regular hallmark cards, but I can't help but to feel how impersonal Christmas cards have evolved as a result of this trend...which is a bit ironic.  The problem is that these cards are now being sent without any trace of human handwriting--not a simple line of hello or a well wish for the holidays...not even a signature many times.  Are we so busy that we can't be bothered, or perhaps this is the only natural progression in the age of technology and all the social media of today...as a result, we pick up a pen less and less and handwritten notes are becoming a thing of the past...sad, but true.

Well, so that's my pet peeve for today...now, onto this photoshoot!  We always have a blast with our annual holiday photo card session and we try our best to come up with some sort of a cohesive theme. This year, we decided to go all plaid (my favorite!), and I absolutely love how the pictures turned out. Here are a few of my favorite, some of which made it into the holiday card this year:


tired little pups...that's a wrap!


Saturday, December 21, 2013

Happy 10! Project: Snowflakes & Lights

Can't believe Christmas is next week!  Things have been very hectic around here lately, and we also had a little scare with Jasper this week which just added to the stress--out of nowhere, he had a slight limp and just did not look his usual perky self.  The following couple of days were filled with anxiety and fear as we carefully monitored his every move.  Thankfully, it turned out to be nothing more than a minor muscle strain and he is pretty much back to normal, but this incident served as a sober reminder of my dogs' declining years and that I'll have to be prepared for things to come...

On a lighter and happier note, dogs and I had a lot of fun playing with Christmas lights in this photoshoot. Neither of them minded the light strings and kept them on even after the camera was put away!


he's starting to get grey eyebrows...sigh

snowflake hairpins!

I really love the simultaneous tilt here!

Monday, December 9, 2013

Happy 10! Project: Reindogs

December is the most festive time of the year and one photo session for the whole month just doesn't seem right, so I'm planning to do one a week.  So, the first one is the reindeer theme--done with couple of antler headbands I picked up for $1 each.  They're cheap, light, and the dogs looked absolutely adorable wearing it!


Monday, December 2, 2013

Thanksgiving Photoshoot Prep

I thought it would be a good idea to share some of the background preparation that goes into each photoshoot in my new project--if nothing else, it's a good way for me to document each step.  So, here are some details to last week's Thanksgiving session.

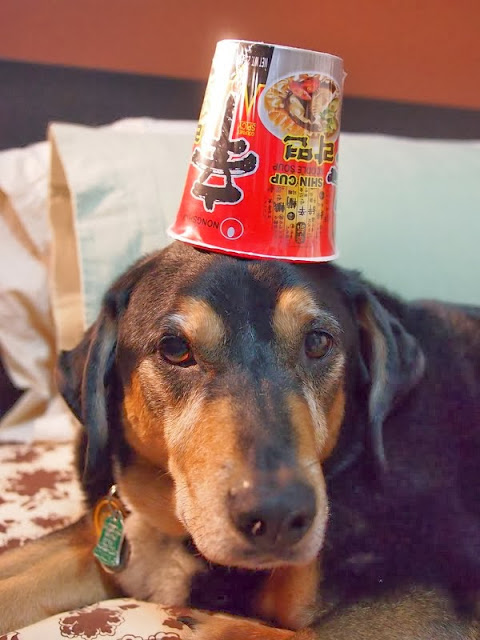
Once I decided on the theme, I set out to buy the pilgrims costumes online, but quickly realized that they're not that easy to come by and also quite costly.  I did however find a whole bunch of tutorials on how to make paper pilgrim's hat and bonnet for kids and that gave me an idea to make my own.  I knew that i wanted to substitute paper with fabric or something a bit more realistic and also more durable, so I had to get a little creative.  For Jasper's hat, I looked around the house for a suitable "top" and at the end decided on an empty cup ramen container.
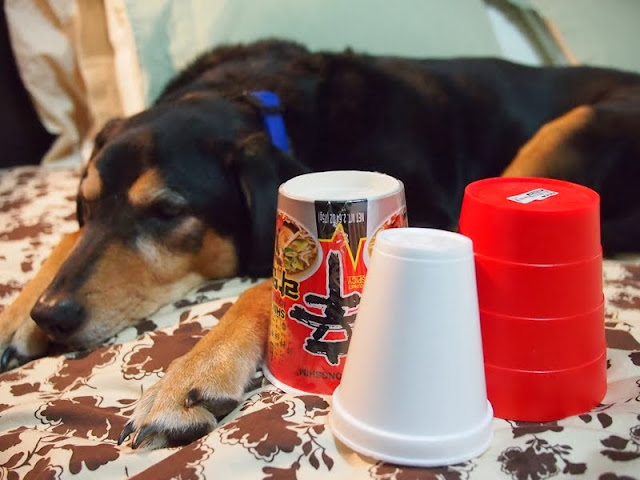
what shall we use...
styrofoam cup was too small...
old Ikea pencil holder was a good size but a bit heavy...
ramen cup was the perfect size and weight!

I was tempted to eat the ramen first, but thought it best to keep it clean, so I put away the noodles in a ziplock bag for a later consumption.  For the brim of the hat, I simply used a cardboard box and cut out a circle in the middle about the same diameter as the ramen cup.
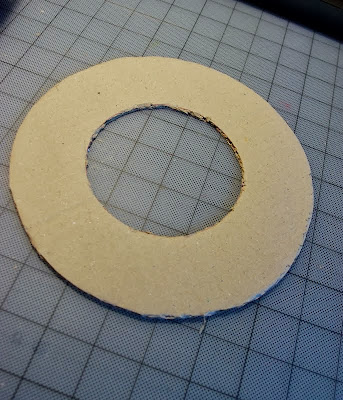
At this point, I took a trip to a local craft store and picked up a sheets of black, white and yellow felt. The rest of the project involved a lot of cutting and gluing of the felt onto the cup ramen and the cardboard template and then joining the two pieces together.  I used my hot gun for the job, but staples or double sided tape will probably work as well, and they also sell the felt sheets with the adhesive backing which I considered (but was too cheap to pay the additional $0.50).  The last step involved sewing on some spare black shoestrings I had lying around (why, I have no idea).  I didn't spend a whole lot of time or effort into making it all pretty and perfect since it's for a photoshoot, but I think it turned out pretty good and I definitely think it's better than using paper.

For Misty's bonnet, I thought about sewing together a real bonnet out of fabric, but I couldn't really find a template that was simple enough for me to even consider attempting on my limited sewing skills, and I really didn't want to make one out of paper, fearing it'll end up ripping and not lasting through the photoshoot.  Then, I found this tutorial which used a thin foam sheet (also found at a craft store) and that was perfect for my needs.  I followed the tutorial exactly and only had to modify it a bit (cutting it a little more in the back) to make it a better fit for a dog's head.  The foam material makes it more rigid but it keeps it's shape better, I thought.

All in all, this project only cost me $6 and couple hours of my time--not too bad!  Now onto the photos--you can see the actual photoshoot pictures in here.