I thought it would be a good idea to share some of the background preparation that goes into each photoshoot in my new project--if nothing else, it's a good way for me to document each step. So, here are some details to last week's Thanksgiving session.
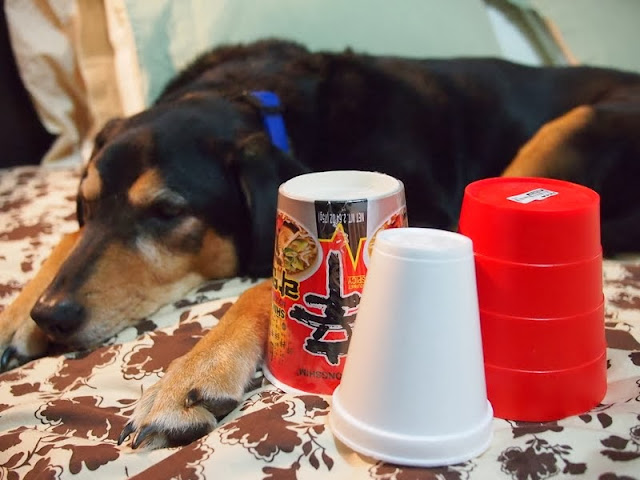
Once I decided on the theme, I set out to buy the pilgrims costumes online, but quickly realized that they're not that easy to come by and also quite costly. I did however find a whole bunch of tutorials on how to make paper pilgrim's hat and bonnet for kids and that gave me an idea to make my own. I knew that i wanted to substitute paper with fabric or something a bit more realistic and also more durable, so I had to get a little creative. For Jasper's hat, I looked around the house for a suitable "top" and at the end decided on an empty cup ramen container.
 |
| what shall we use... |
 |
| styrofoam cup was too small... |
 |
| old Ikea pencil holder was a good size but a bit heavy... |
 |
| ramen cup was the perfect size and weight! |
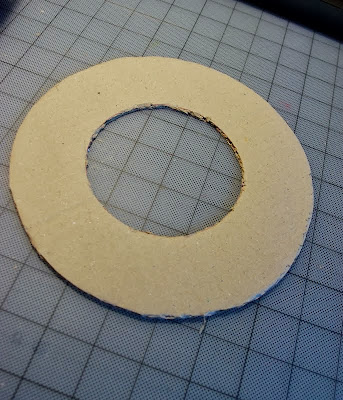
I was tempted to eat the ramen first, but thought it best to keep it clean, so I put away the noodles in a ziplock bag for a later consumption. For the brim of the hat, I simply used a cardboard box and cut out a circle in the middle about the same diameter as the ramen cup.
At this point, I took a trip to a local craft store and picked up a sheets of black, white and yellow felt. The rest of the project involved a lot of cutting and gluing of the felt onto the cup ramen and the cardboard template and then joining the two pieces together. I used my hot gun for the job, but staples or double sided tape will probably work as well, and they also sell the felt sheets with the adhesive backing which I considered (but was too cheap to pay the additional $0.50). The last step involved sewing on some spare black shoestrings I had lying around (why, I have no idea). I didn't spend a whole lot of time or effort into making it all pretty and perfect since it's for a photoshoot, but I think it turned out pretty good and I definitely think it's better than using paper.
For Misty's bonnet, I thought about sewing together a real bonnet out of fabric, but I couldn't really find a template that was simple enough for me to even consider attempting on my limited sewing skills, and I really didn't want to make one out of paper, fearing it'll end up ripping and not lasting through the photoshoot. Then, I found this
tutorial which used a thin foam sheet (also found at a craft store) and that was perfect for my needs. I followed the tutorial exactly and only had to modify it a bit (cutting it a little more in the back) to make it a better fit for a dog's head. The foam material makes it more rigid but it keeps it's shape better, I thought.
All in all, this project only cost me $6 and couple hours of my time--not too bad! Now onto the photos--you can see the actual photoshoot pictures in
here.


