Monday, February 24, 2014

Valentine's Photoshoot Prep

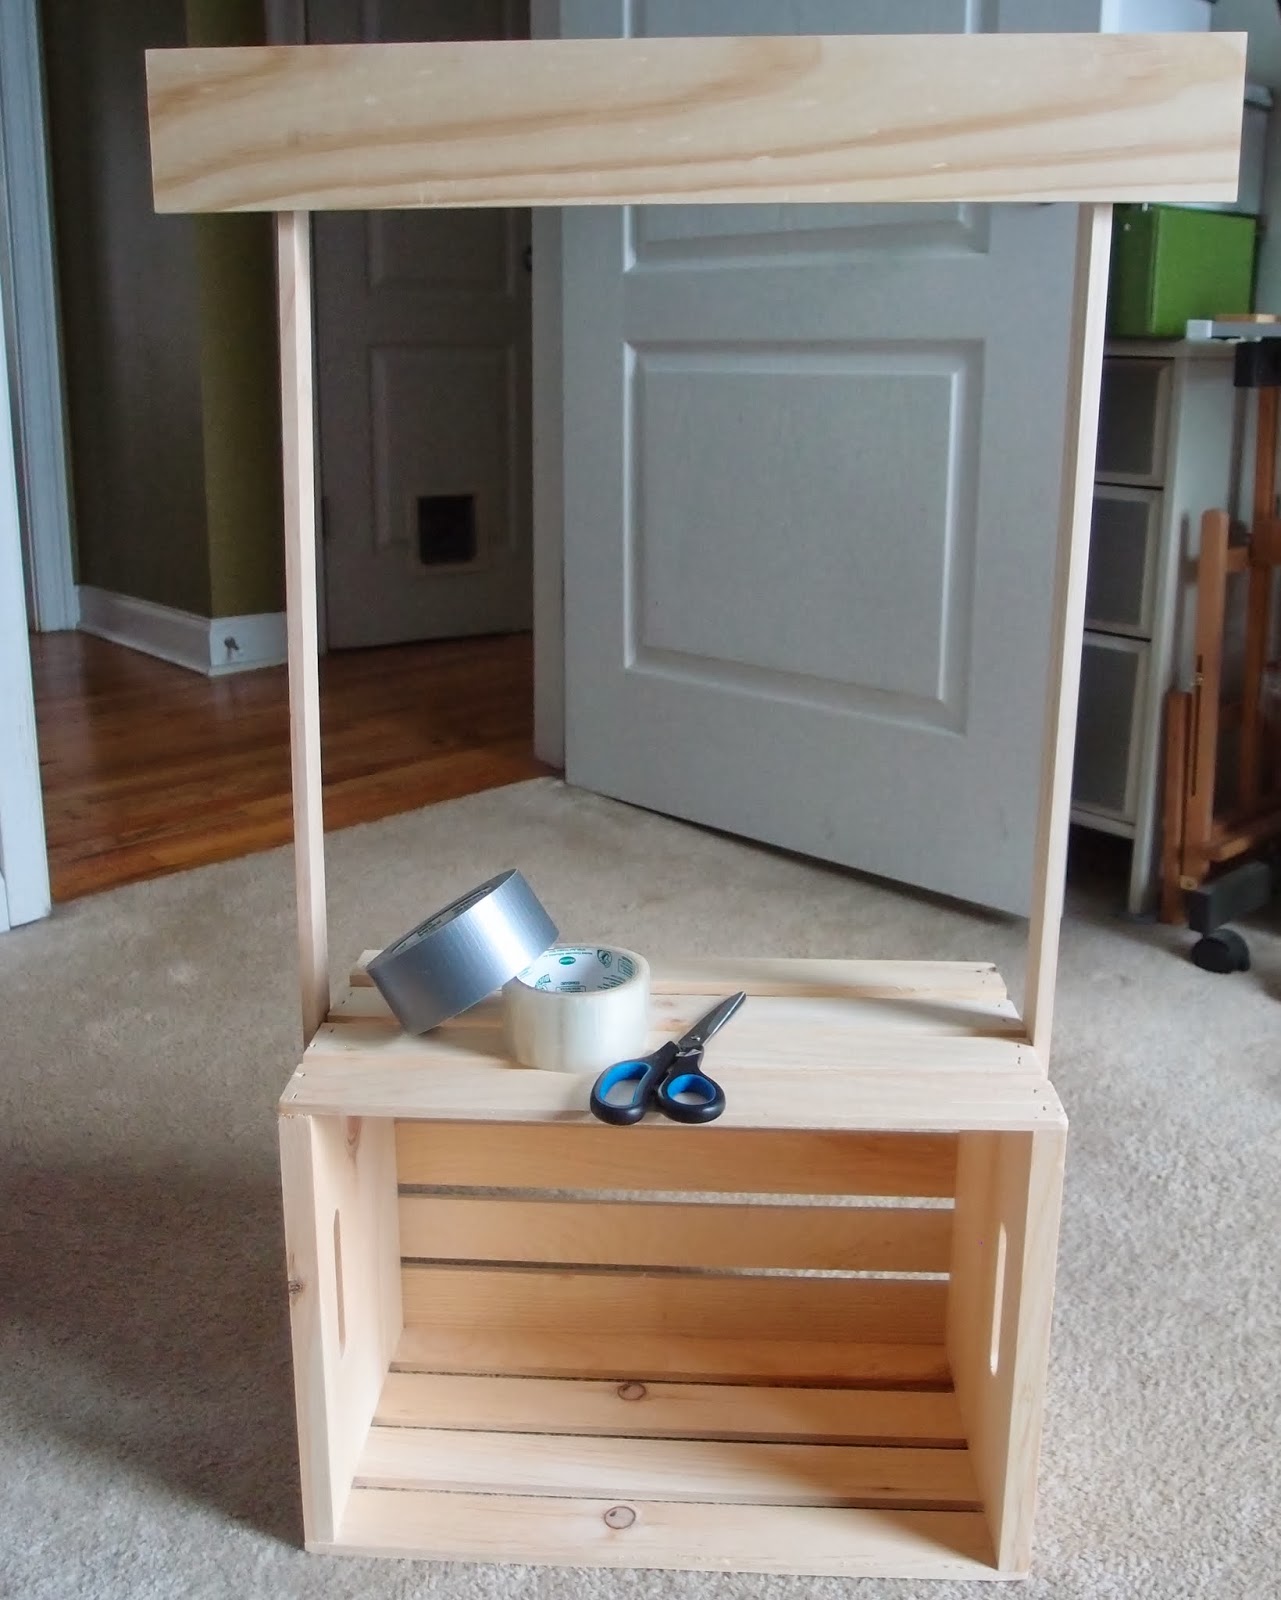
The recent photo session was a lot of fun and photos turned out wonderful.  I got the idea to do a kissing booth theme while browsing through Pinterest awhile ago.  A lot of people were using these wooden crates for the booth and I just happened to have a few that I bought for my office renovation, so it worked out good.  You can find these crates at many different places--I got mine at Michaels and Home Depot.  Price was slightly cheaper at Michaels using their 40% coupon, but I thought the quality was a bit better with the ones from Home Depot.  The only thing is, they don't stock them in store so you'll have to place the order online and go pick them up later.  It took about 5 days for me, which isn't bad if you're not in a rush.  I paid about $10/crate. I also picked up 2 skinny strips of wood and 1 wide plank to complete the structure for about $5.

You can get as fancy and creative as you'd like in decorating the kissing booth.  I decided to keep mine pretty simple and added just the sign and a row of hearts.  Since I had to reuse my crate for the office, I opted against using nails or screws, but instead used heavy duty double-sided adhesive strips and duct tape.  It held well enough for the photoshoot, but one side did come apart couple days later, so my advice would be to secure it firmly with proper hardware, especially if you plan on using this to take photos of little ones.  Here are a few photos of the steps outlined:
gather all pieces: crate, 2 side sticks, and one wide board

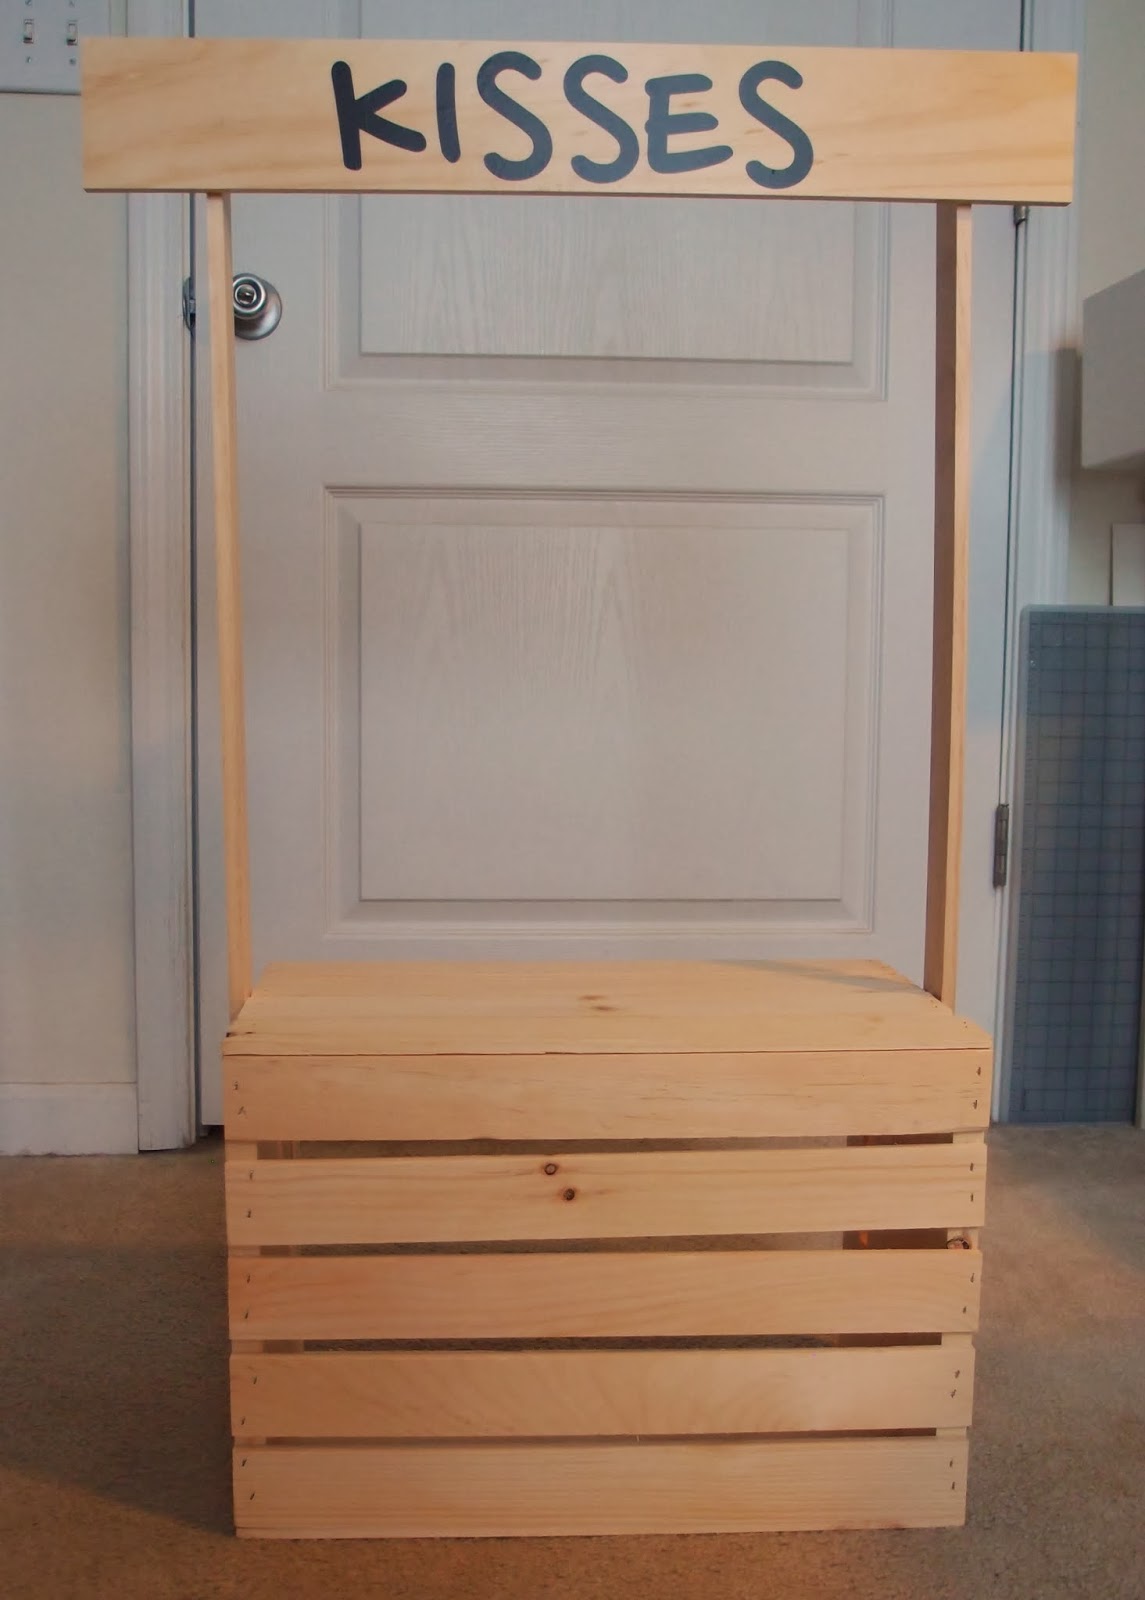
assemble the pieces--I strongly recommend nails or screws.  I also made the mistake of putting the board facing the wrong side initially.

I added vinyl letters for the sign

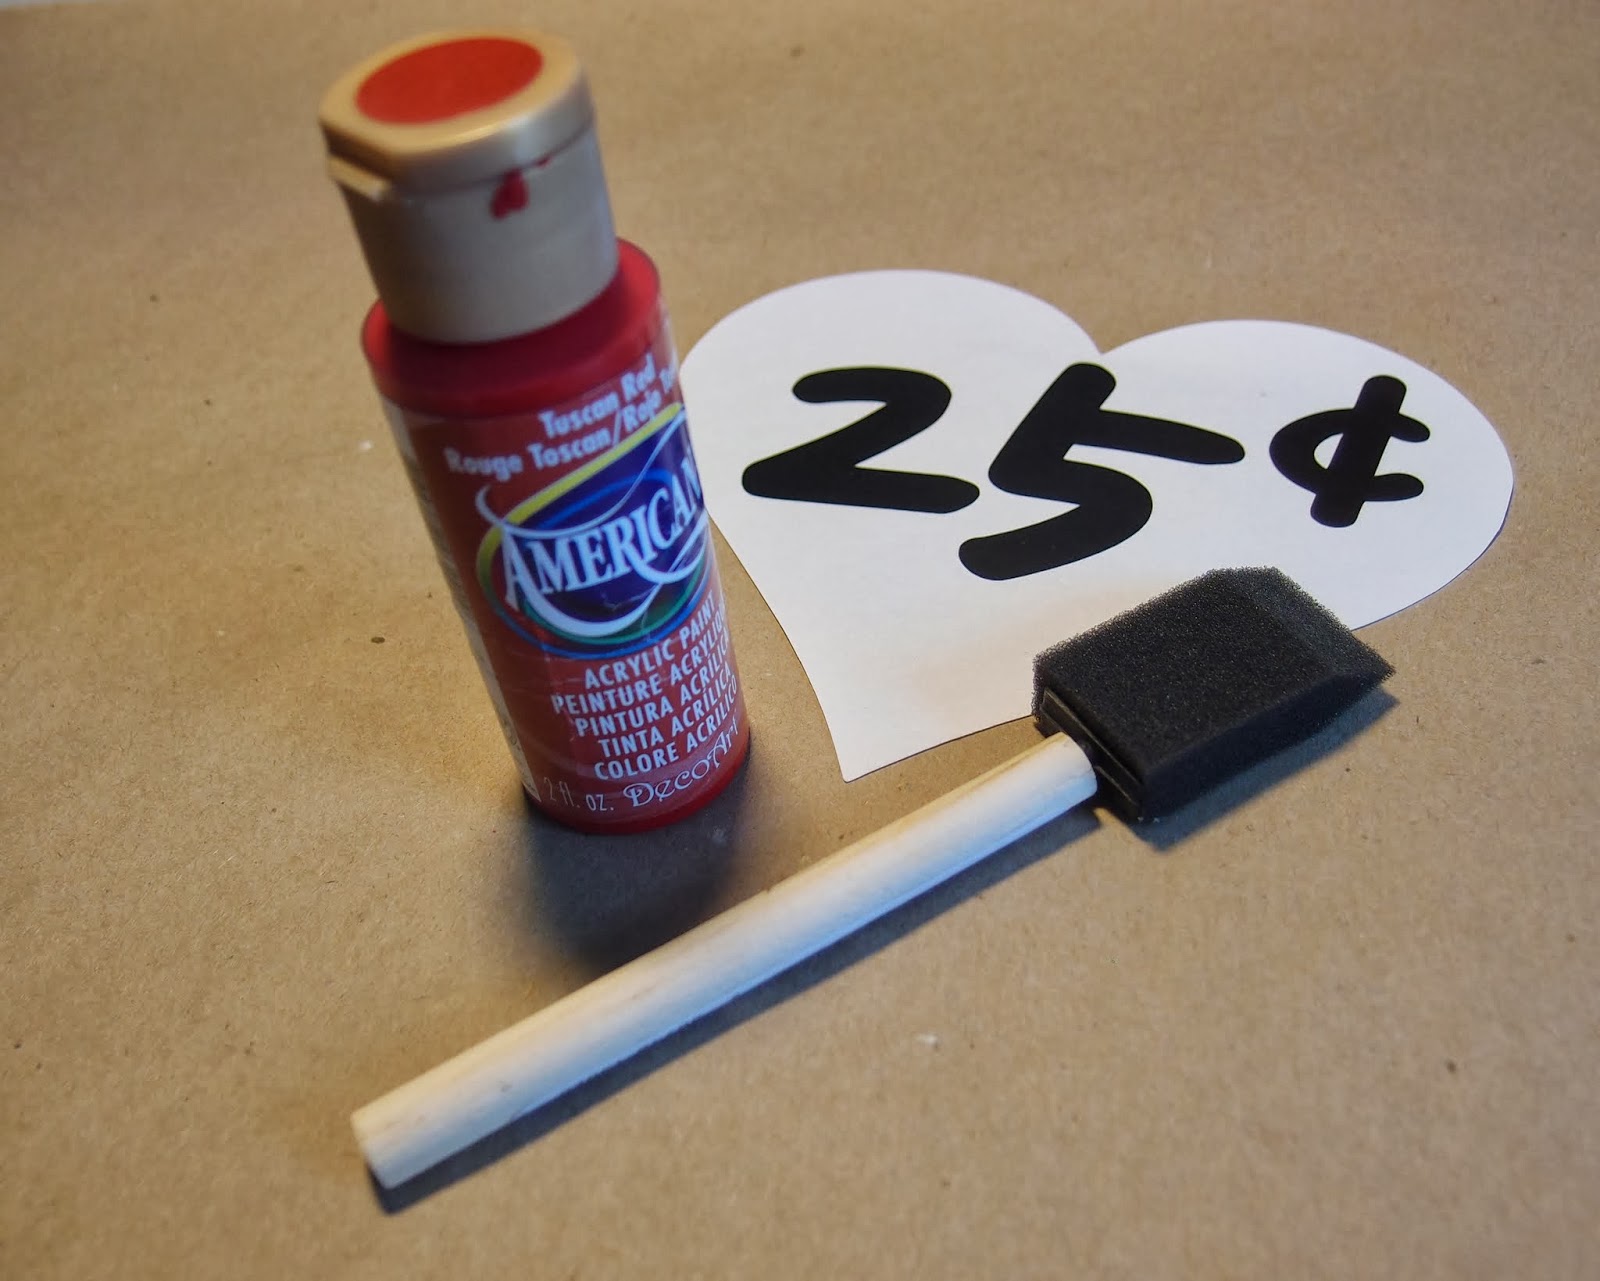
I didn't have red paper on hand so I had to get creative and do a quick stencil job.

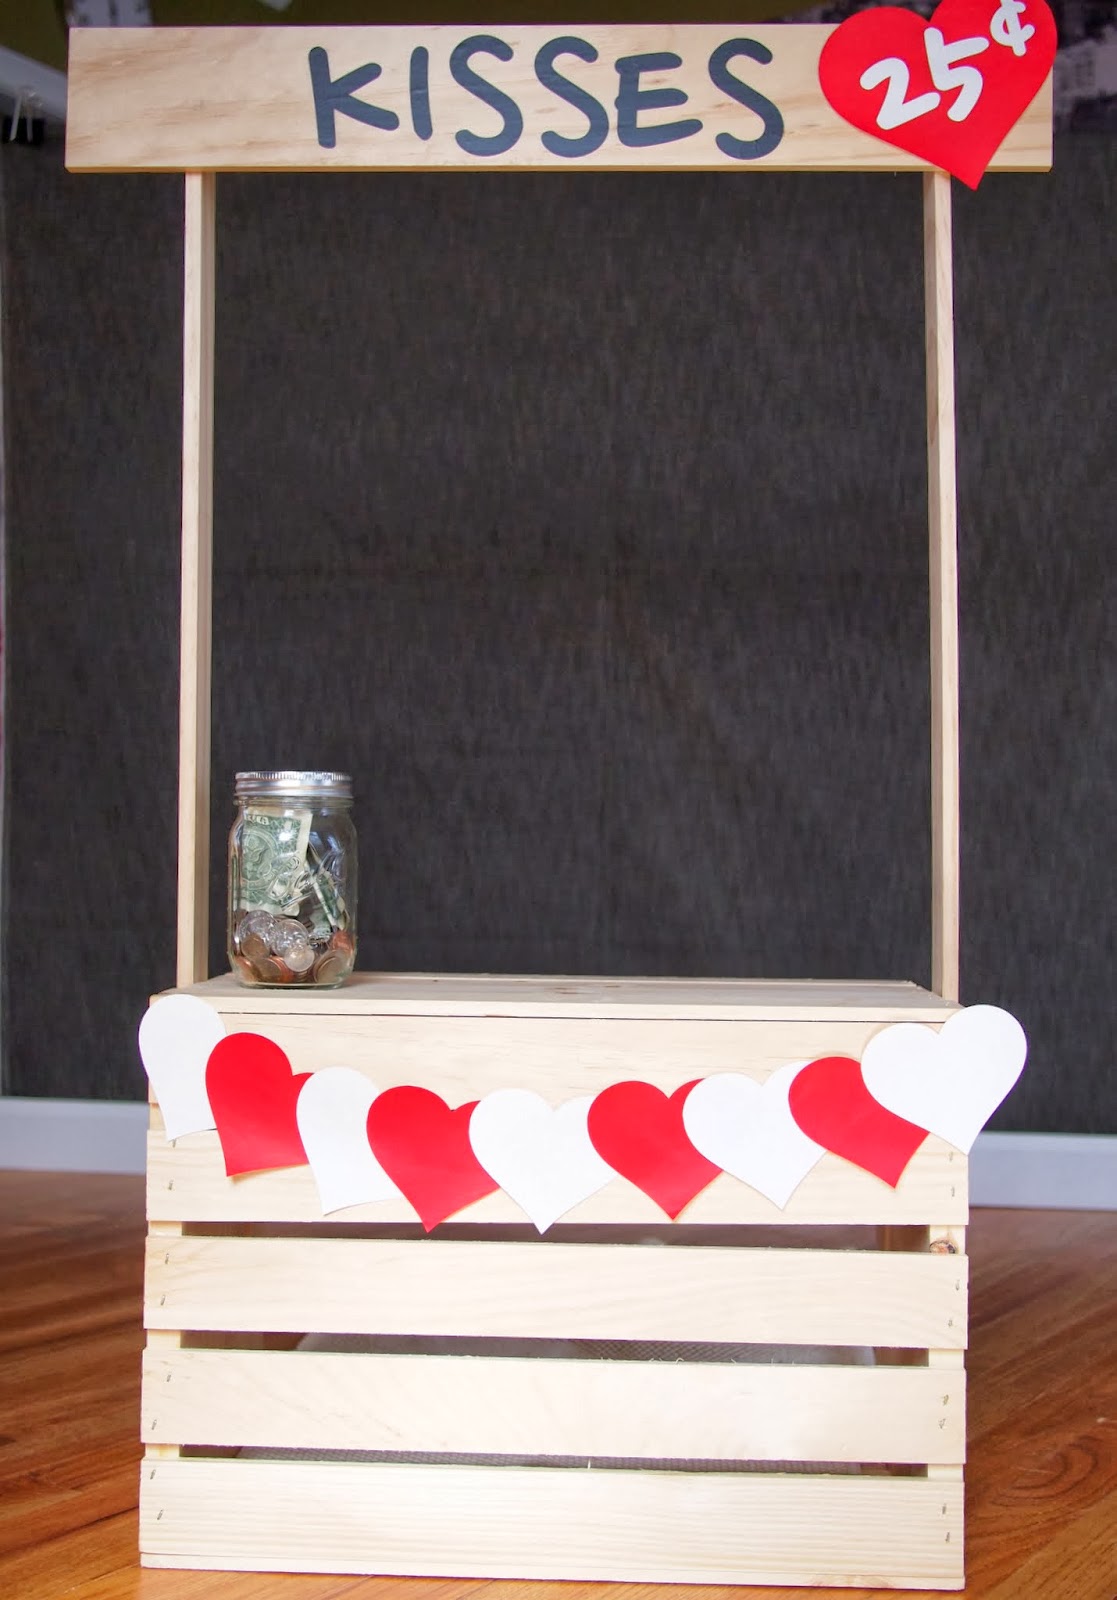
I taped a row of hearts and that's it!
All in all, it was a pretty simple project and well worth my time and effort.  It took a little longer than anticipated since I had to paint the red hearts.  Yes, it would've been a lot faster and simpler to just use red paper, but we were stuck in snow and I had to do with what I had in the house.  Oh, and I added the mason jar for the tips, and we were ready for some smooches! You can see the actual photos from the session here.

Friday, February 21, 2014

Happy 10! Project: Be My Valentine

Here's one more late addition to the recent photoshoot:

so true...

So glad it's the weekend, and I'm totally looking forward to some warmer weather!

Wednesday, February 19, 2014

DIY & Crafts: Valentine Lightbulb

Every year for Valentine's day, I try to make something instead or in addition to the usual gifts.  For this year, I've had my mind set on doing this diy lightbulb project ever since I saw it on Pinterest over a year ago. I remember thinking back then that it seemed a bit complicated and dangerous, but it looked so darn cute that I just had to try it this time.  After completing it, I have to say that it wasn't as hard as I initially feared.  Yes, you do have to be careful since there's lots of little sharp glass bits to work with, but with proper safety goggles and gloves on, removing the filament of the bulb (hardest part of the project) went without a hitch.  I used this tutorial from Design Sponge, which also gives you a link to TeamDroid for a separate tutorial on how to clean out the lightbulb. Here are some of the pictures to show the steps. I didn't bother including any of how I cleaned out the bulb since the above tutorial shows it in great detail--just follow their instructions, go slow and don't forget the safety precautions.

to add the wire sculpture, I drilled a tiny hole in the cube and secured it with a little silicone adhesive. I got both the wooden cube and the wire from Michaels. 
I printed out a few with different fonts.
I used brads for a decorative touch. Add the brads to the paper strip first then glue the whole thing to the cube.
use strong clear adhesive to affix the lightbulb to the cube and wait for it to fully cure before handling it.
After 48 hours for the glue to set and it's ready!
incandescent lighbulbs are almost vintage nowadays, aren't they? 

It's a neat little project and definitely makes a very unique gift! I've always liked the shape of a lightbulb and wished I could somehow reuse an old bulb whenever I had to throw one out, and now I'm wondering what else I could turn it into to--maybe a planetarium or a snow globe?


Tuesday, February 18, 2014

Happy 10! Project: Be My Valentine

January was very long and stagnant...physically, we were immobilized by all the crazy weather, and emotionally, I had to deal with the 2 year anniversary of my mom's passing.  It was a really hard month and I guess every January will always be difficult...well, I'm glad it's now February and hopefully I can get going with the rest of the year!

For this photoshoot, it was all about love and happiness!  I had the idea of doing a kissing booth theme for a while now and thought what better time than valentine's day!  I will put together a separate post soon with all the behind the scene prep work that went into it, but it was pretty easy and I think totally worth a little extra effort.  Unfortunately, one of my babies just didn't feel up to sitting behind this "suspicious looking wooden box" for the pictures, so with him I had to improvise and do a session that was more in his comfort zone.

My favorite photo of the session however, came at the end of the shoot when I least expected it--I was lying on the ground taking a rest when both dogs decided to come and join me and they were in a perfect side by side position and ended up falling asleep that way--it was beyond cute and sweet and I'm glad my camera was within my reach to have captured it without ruining the moment!  Just goes to show those natural shots are always the best!

"open for business!"

you'll always have my heart!

together forever!

Well, I hope everyone had a wonderful weekend sharing love with those special people (and animals) in your life!  Valentine's day shouldn't be about extravagent gifts and dining out at fancy restaurants, but rather about appreciating the special gift of love that we were given.  Okay, that's enough sappy talk for one day...I leave you with my favorite picture:

happy valentine's day!